

Make sure on superstol that the top of the former makes a straight line to headrack, this will not allow it to be parrallel w firewall in the front.
The windshield will force this to happen when you bolt together, but you need to get angle right before you trim the sides because it is different than highlander.
Extreme Windshield Installations
-
BDA
- Veteran Member
- Posts: 707
- Joined: Mon Aug 22, 2016 11:25 am
- Location: Kenai Alaska
Re: Extreme Windshield
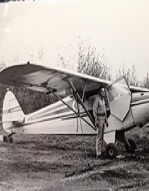
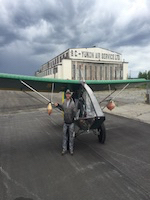
SuperStol XL Alaskan With Titan 340
N331AK. Shawn Taplin
Wing extensions,Symetrical Airfoil tail ribs (NACA 21)
Mods in progress: Heavier struts, Double slotted flaps
Goal: 15mph no wind
N331AK. Shawn Taplin
Wing extensions,Symetrical Airfoil tail ribs (NACA 21)
Mods in progress: Heavier struts, Double slotted flaps
Goal: 15mph no wind
-
CanadianSheepHunter
- Veteran Member
- Posts: 678
- Joined: Thu Feb 26, 2015 1:05 pm
Re: Extreme Windshield
Yes I darn near trimmed the sides of the former then read the instructions again where it mentions this.
-
CanadianSheepHunter
- Veteran Member
- Posts: 678
- Joined: Thu Feb 26, 2015 1:05 pm
Re: Extreme Windshield
The flat sunroof extension is touching the floor(comes with extreme windshield Kit) it is attached to the factory front windshield bracket with a few flush rivets for now. I trimmed some off rear edge after I made the holes for my floating nut plates spaced every 3”. I trimmed the rear off with a “Arberitte” knife after a sheet metal guy told me to...just clamp a metal flat bar along the line and score with lots of pressure 20 times then snap it off...makes a nice clean cut that will be totally visible from cockpit.
You do not have the required permissions to view the files attached to this post.
-
CanadianSheepHunter
- Veteran Member
- Posts: 678
- Joined: Thu Feb 26, 2015 1:05 pm
Re: Extreme Windshield
The rectangular notches you must make to clear the smaller headrack fuselodge tubes. Those rectangular notches are in the factory front windshield bracket.
You do not have the required permissions to view the files attached to this post.
-
CanadianSheepHunter
- Veteran Member
- Posts: 678
- Joined: Thu Feb 26, 2015 1:05 pm
Re: Extreme Windshield
The piece in my hand is the factory front windshield bracket, it came with the bend you see. The piece attached to it(on right) is the sunroof extension that I had a sheet metal guy match the bend with a brake to match the bend on the factory front windshield bracket. This pic was taken before I trimmed the rear edge off the sunroof extension.
You do not have the required permissions to view the files attached to this post.
-
CanadianSheepHunter
- Veteran Member
- Posts: 678
- Joined: Thu Feb 26, 2015 1:05 pm
Re: Extreme Windshield
Sitting in cockpit looking forward at the front windshield bracket with the sunroof extension trimmed. I install the floating nut plates after the brackets are painted(I will be putting silicone in the cleco holes that don’t need to be there for the flush head rivets that I will use. I made the Center holes the same diameter as the hole in the base of the floating nut plates to have maximum allowable area for the machine screw to align if needed.
You do not have the required permissions to view the files attached to this post.
-
CanadianSheepHunter
- Veteran Member
- Posts: 678
- Joined: Thu Feb 26, 2015 1:05 pm
Re: Extreme Windshield
Butt rib T’s not riveted yet because I want to paint them.
You do not have the required permissions to view the files attached to this post.
-
CanadianSheepHunter
- Veteran Member
- Posts: 678
- Joined: Thu Feb 26, 2015 1:05 pm
Re: Extreme Windshield
The factory rear sunroof bracket, never riveted yet as it will be painted.
You do not have the required permissions to view the files attached to this post.
-
CanadianSheepHunter
- Veteran Member
- Posts: 678
- Joined: Thu Feb 26, 2015 1:05 pm
Re: Extreme Windshield
Probably don’t need so many clamps.
You do not have the required permissions to view the files attached to this post.
-
CanadianSheepHunter
- Veteran Member
- Posts: 678
- Joined: Thu Feb 26, 2015 1:05 pm
Re: Extreme Windshield
Notch made to be able to get front wing pin in and out, but will be trimming Lexan more yet(along black line)
You do not have the required permissions to view the files attached to this post.
-
CanadianSheepHunter
- Veteran Member
- Posts: 678
- Joined: Thu Feb 26, 2015 1:05 pm
Re: Extreme Windshield
Holding Slat closed with my hand, clearance a little tight in the one spot but not touching. I trimmed the Lexan along the butt rib with the oscillating cutter tool worked great.
You do not have the required permissions to view the files attached to this post.
-
CanadianSheepHunter
- Veteran Member
- Posts: 678
- Joined: Thu Feb 26, 2015 1:05 pm
Re: Extreme Windshield
Rear not drilled just clamped.
You do not have the required permissions to view the files attached to this post.
-
CanadianSheepHunter
- Veteran Member
- Posts: 678
- Joined: Thu Feb 26, 2015 1:05 pm
Re: Extreme Windshield
Looking from rear
You do not have the required permissions to view the files attached to this post.
-
CanadianSheepHunter
- Veteran Member
- Posts: 678
- Joined: Thu Feb 26, 2015 1:05 pm
Re: Extreme Windshield
Looking from rear at the right side of factory rear sunroof bracket.
You do not have the required permissions to view the files attached to this post.
-
CanadianSheepHunter
- Veteran Member
- Posts: 678
- Joined: Thu Feb 26, 2015 1:05 pm
Re: Extreme Windshield
Looking from rear at the factory sunroof bracket
You do not have the required permissions to view the files attached to this post.