

After a near 2-1/2 year hiatus from working on the SS, I'm back on it near full time. Had to develop some property and build a house for the wife. Ok, I did get a nice heated shop out of the deal!
Very close to putting together the panel. Would appreciate any recent pics of completed panels and/or thoughts on the subject. Having helped a whole bunch of folks build composite airplanes in my past, with many over doing it with panel hardware, my inclination is to do less than more. That said, the newer glass panel stuff is very intriguing.
Many vendors are putting on specials for the Sun 'n Fun event and I'd like to take advantage and spend a little money. Any suggestions on what I should be looking at?
Thanks ahead of time.
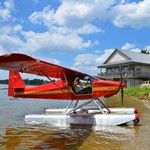
Panel pics
-
mac

- Seasoned Member
- Posts: 60
- Joined: Sun Jul 29, 2012 7:57 pm
- Location: Grass Valley, CA.
Panel pics
You do not have the required permissions to view the files attached to this post.
Mark M.
N49SS in Phase 2....for good!
N49SS in Phase 2....for good!
-
SheepdogRD

- Proprietor
- Posts: 934
- Joined: Tue Nov 30, 2010 5:41 pm
- Location: West of Atlanta, GA
Re: Panel pics
Some years ago, Karl von Kaenel built Highlander N627KK with a minmal instrument panel:
I liked Karl's approach, but I wanted better visibility out through the sides. Here's a panel -- from SuperSTOL N106GS -- that opens up some space:
My Highlander panel -- which I'm finalizing now -- is about 20" wide, leaving 7" open on either side. I want to be able to see around the sides and out through the Lexan cowl side panels.
My panel is pretty simple. It will include a GRT EMS and two iPad Minis, one running WingX Pro and one linked to a Levil BOM. There will also be a Garmin GTR200 radio, Sandia STX 165 Transponder, Levil ADS-B out system, and the usual array of switches, knobs and lights.
You do not have the required permissions to view the files attached to this post.
Richard Holtz
Highlander N570L -- Ms. Tonka -- in gestation
If just enough is really good, then too much ought to be perfect.
Highlander N570L -- Ms. Tonka -- in gestation
If just enough is really good, then too much ought to be perfect.
-
mac
- Seasoned Member
- Posts: 60
- Joined: Sun Jul 29, 2012 7:57 pm
- Location: Grass Valley, CA.
Re: Panel pics
Thanks Richard. That's the kind of feedback I was looking for! Yes, the Levil BOM looks interesting. Will certainly be exploring it more. Thanks again.
Mark M.
N49SS in Phase 2....for good!
N49SS in Phase 2....for good!
-
SheepdogRD
- Proprietor
- Posts: 934
- Joined: Tue Nov 30, 2010 5:41 pm
- Location: West of Atlanta, GA
Re: Panel pics
I had originally planned to use the Levil 3AW, which is a system similar to the BOM, but it has a wired input that allows it to display the GRT EMS data on the iPad. I'd already bought the GRT when I decided to switch to the BOM, which lacks that wired connection, so the GRT -- which has an archaic greenscreen display that only shows numbers -- is not the best EMS choice for the Levil installation. I'd recommend looking at other EMS systems that can provide a graphical display.
I've read that Belite has one coming for about $500, but I don't know if that includes probes. That's information from a mid-2017 news release; the instrument still isn't on the Belite website.
I've read that Belite has one coming for about $500, but I don't know if that includes probes. That's information from a mid-2017 news release; the instrument still isn't on the Belite website.
Richard Holtz
Highlander N570L -- Ms. Tonka -- in gestation
If just enough is really good, then too much ought to be perfect.
Highlander N570L -- Ms. Tonka -- in gestation
If just enough is really good, then too much ought to be perfect.
-
FlyerChief
- Veteran Member
- Posts: 292
- Joined: Tue Nov 03, 2009 9:53 pm
- Location: Ontario, Canada
Re: Panel pics
Mac,
Check out these two links for more ideas on layout, etc...
viewtopic.php?f=218&t=23908
viewtopic.php?f=218&t=20710
Technology has changed even in the last two years, so looking around at Sun-n-Fun is a great idea.
Regards,
Dan
Check out these two links for more ideas on layout, etc...
viewtopic.php?f=218&t=23908
viewtopic.php?f=218&t=20710
Technology has changed even in the last two years, so looking around at Sun-n-Fun is a great idea.
Regards,
Dan
When everything seems to be going against you, remember that the airplane takes off against the wind, not with it. ~Henry Ford
-
BucF16
- Veteran Member
- Posts: 463
- Joined: Sun Mar 23, 2014 11:47 am
- Location: Alexandria, Ohio
Re: Panel pics
Hey Richard,
I have done some research since we last discussed the BOM. It had everything I wanted, BUT GRT engine input to my iPad. So I’ve switched to the AW3. It will feed my iPad with data for WingXPro and there is an input for the GRT. That is graphic with an app with iLevel/ with a split screen with WingXPro.
What you lost is aoa.
Check it out, and if I’m out in left field, please let me know!
My panel Is about to be laser cut. It is the normal height, but only 18 in. wide. Much like Robbie Peteson.
So when I’m finished I’ll posed it on Highlander 393 thread.
Cheers,
Bruce
Bruce Johnson Highlander # 393
"Because I fly, I envy no man on Earth"
Builder web site:
http://www.bruceshighlander.blogspot.com
"Because I fly, I envy no man on Earth"
Builder web site:
http://www.bruceshighlander.blogspot.com
-
danerazz
- Veteran Member
- Posts: 1240
- Joined: Tue Aug 18, 2009 9:33 pm
- Location: Bangor
Re: Panel pics
My panel was cut with a fly cutter (easily the most dangerous thing in my shop) and some step drills. Given my (ahem) "classic" engine choice I thought it heresy to install any "glass" in the panel. I went old-school analog, cub simple (J3, not PA18). The only thing I added (other than radio/xpdr) was an air-fuel ratio gauge, mostly just to help set the carb (Rotec TBI) up. Otherwise, just airspeed, altimeter, tach, inclinometer, single EGT/CHT combo, OP/OT combo. There is one alt. fail idiot light, and a wet compass on top. I just painted the panel tonight, and am labeling with a Brother P-touch PC connected label printer. I am out of town for most of the next two weeks, but then will assemble the panel and put it into safe storage, hopefully never to be disassembled again. I will try to post some pictures then.
On a side note, I am getting a 20' container dropped off tomorrow so I can move the fuselage out of my basement and wings in to cover. Then the fuselage will be covered and painted when the wings are ready. The wings are almost ready to cover, so hopefully I can get everything together and fire up the engine by early summer. I have to do it relatively quickly because my wife is not happy about the 20' shipping container in the driveway.
I really need a larger shop. I can either have the wings or the fuselage in there, but not both.
Dane
Paralysis by analysis
#242
Paralysis by analysis
#242
-
AV8R Paul
- Veteran Member
- Posts: 578
- Joined: Sun Mar 22, 2015 7:49 pm
- Location: Garland, Texas
Re: Panel pics
Since you have Experience with Composite Construction, I am Building Carbon Fiber Panel. I am using Garmin G3X Touch, Garmin G5, Garmin Radio, & Transponder. Next Week I am going out to work with Chris Wallen on the plane. Chris will be doing some panel layouts for me to make a decision on placements. However, the top Picture is my Plane's Panel that I fabricated. The bottom Picture is another plane Chris Wallen Built. I will have the G3X in the Center like the panel on the bottom, and I will have the G5 replacing the Airspeed & Altimeter in front of the pilot.
You do not have the required permissions to view the files attached to this post.
AV8R Paul
Certified Light Sport Repairman LSRM-A
Certified Light Sport Repairman LSRM-A
-
TD1
- Forum Regular
- Posts: 21
- Joined: Wed May 24, 2017 3:36 pm
- Location: Hawaii
Re: Panel pics
Interesting Paul, may be an illusion but from the pic your carbon panel will be asymmetric? Is that to fit the glass for the left seat?
Tom Dougherty
Kahului, HI
Kahului, HI
-
Tralika
- Veteran Member
- Posts: 386
- Joined: Thu Oct 08, 2009 12:49 pm
- Location: Wasilla Alaska
Re: Panel pics
My approach to panel design can be found in one of the links above on FlyerChief's post so I won't bore you with again here. I used the aluminum panel blank supplied with my kit an then covered it with carbon fiber vinyl overlay I bought on Amazon. It looks OK and is much easier than painting. Obviously I went for a very simple VFR panel rather than the glass panel approach. I like the simplicity but to each his own. If you go with the glass panel please remember to look outside when flying VFR.
The SS panel can be a challenge to design. The Highlander panel has a lot more usable space. There is more structure behind the SS panel to reinforce the upper landing gear attach point on the sides of the fuselage. That reduces the usable real estate quite a bit. During your design process I recommend you use the manufacturers published dimensions to lay out your panel before you buy any equipment.
Here is a link to an article on panel design that you might find interesting.
http://www.vansairforce.net/articles/th ... esign1.htm
You do not have the required permissions to view the files attached to this post.
John Nealon
Wasilla, Alaska
Highlander Extreme #191
mykitlog.com/jnealon
Wasilla, Alaska
Highlander Extreme #191
mykitlog.com/jnealon
-
AV8R Paul
- Veteran Member
- Posts: 578
- Joined: Sun Mar 22, 2015 7:49 pm
- Location: Garland, Texas
Re: Panel pics
It is an illusion, left side & right side are pretty close to the same height, and the high portion is centered, all as close as you can get when your whittling foam & covering with carbon fiber. It’s not a precise process, everything is within 1/4 inch.TD1 wrote:Interesting Paul, may be an illusion but from the pic your carbon panel will be asymmetric? Is that to fit the glass for the left seat?
The G3X goes in the center, and the G5 will go in front of the left pilots seat. The G5 fits is 3.4"W x 3.6"H x 3.0” deep. As you can see from the top 2 pictures the G5 fits in a standard 3 1/8 mounting hole. I was planning on a standard airspeed & altimeter gauge, when I decided to look at the Garmin G5. The G5 displays the 6 pack of instruments in one, and weighs 13.3 oz. I compared it to an Airspeed gage from Aircraft Spruce at 13.4 oz, and you get Airspeed, altimeter, compass heading, rate of climb, attitude gyro, turn and bank, slip ball, all for less than the weight of a standard Airspeed gauge. So I saved the weight of the altimeter which was 1.4 pounds.
The 3rd picture is of the panel on a jig so I could glass the face of the panel. I should have set the panel on the floor to take a picture so I could stand centered, and have the focal distance to better show the shape. The panel tapers down on both left & right side for visibility, short people like myself need forward visibility.
You do not have the required permissions to view the files attached to this post.
AV8R Paul
Certified Light Sport Repairman LSRM-A
Certified Light Sport Repairman LSRM-A
-
TD1
- Forum Regular
- Posts: 21
- Joined: Wed May 24, 2017 3:36 pm
- Location: Hawaii
Re: Panel pics
Thanks, makes sense now that I'm looking closer I can see the pic angles. I have read that fitting instruments, especially the bigger glass, can be a challenge with the SS and it's extra framework. Was curious if someone had taken an "outside the box" route. =D
Tom Dougherty
Kahului, HI
Kahului, HI
-
Tralika
- Veteran Member
- Posts: 386
- Joined: Thu Oct 08, 2009 12:49 pm
- Location: Wasilla Alaska
Re: Panel pics
You can't get much more "outside the box" than the Unpanel. I doubt it would work in the SS/Highlander airframe.
https://www.youtube.com/watch?v=7-3EhquJp8Q
https://www.youtube.com/watch?v=7-3EhquJp8Q
John Nealon
Wasilla, Alaska
Highlander Extreme #191
mykitlog.com/jnealon
Wasilla, Alaska
Highlander Extreme #191
mykitlog.com/jnealon
-
mac
- Seasoned Member
- Posts: 60
- Joined: Sun Jul 29, 2012 7:57 pm
- Location: Grass Valley, CA.
Re: Panel pics
Thanks everyone for your input on the subject. Much appreciated. Need to resolve the panel configuration in the next couple of weeks to stay on track!
One comment.........be careful grinding, sanding or cutting carbon. It's not nearly as forgiving on you as is ordinary fiberglass. Best to always wear a mask........or better yet, have a fan (big one!) sucking the particles away from you. Fiberglass is an irritant and is expelled from your body, mostly. Carbon........not so much! Just a thought folks.
Thanks again.
Mark M.
N49SS in Phase 2....for good!
N49SS in Phase 2....for good!
-
kenryan

- Veteran Member
- Posts: 342
- Joined: Sat Jan 01, 2011 3:46 pm
- Location: anchorage, ak
Re: Panel pics
When building my SuperSTOL panel I was looking at some places where clearance from truss tubes was less than 1/16th inch. To get things properly placed I first made my panel out of Lexan. That allowed me to see all of the truss members and accurately place components between them. Then I traced the Lexan file to the aluminum supplied with the kit.
You do not have the required permissions to view the files attached to this post.
Super Stol Kit #299