

Does anyone know what is evolved in swapping from the 9 gal tanks to the 13 gal tanks? There is a compression strut quite near the tanks in my early Highlander, and of course the ribs. Any other issues or concerns?
My port side fiberglass tank is leaking near the leading edge outboard.
Alan
Fuel tank upgrade
-
alan
- Veteran Member
- Posts: 398
- Joined: Fri Feb 04, 2005 1:39 am
- Location: Baytown, TX
Fuel tank upgrade
If I had known I would live this long I would have taken better care of myself.
-
jak
- Veteran Member
- Posts: 445
- Joined: Mon Mar 17, 2008 9:40 pm
- Location: toccoa Ga
Re: Fuel tank upgrade
Alan we have aluminum tanks now call us. Jak PS I'm off now til Mon.
Pick up a rifle and you instantly change from a subject to a citizen.
-
Gil T

- Veteran Member
- Posts: 162
- Joined: Thu Jun 03, 2010 10:57 pm
- Location: Quartzsite AZ
Re: Fuel tank upgrade
Alan
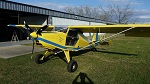
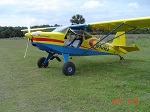
I don't how much easier or harder the metal tanks are from the fiberglass ones to put in. Just beware if you ask Troy and he says "Oh sure, you can do it". My airplane is an Escapade/Highlander and I did accomplish it. And it sure makes a difference having that extra few gallons. I first thought I could do it with the wings on but it would have really made it hard to do the covering and painting so off they came. Just make sure you have plenty of help removing them. Her are a few pics of the fun involved.
Gil T
You do not have the required permissions to view the files attached to this post.
-
alan
- Veteran Member
- Posts: 398
- Joined: Fri Feb 04, 2005 1:39 am
- Location: Baytown, TX
Re: Fuel tank upgrade
OK, here's the story, shortened quite a bit.
I called Jak and he told me he was doing the first factory installation of the 13 gallon tanks designed for the Super STOL in a new Highlander build. If I would come up he would walk me through how it's done. We arrived on July 14th and got a good look how it is done on a new wing. Mounting the brackets is tough to get exactly right. The fiberglass tanks just glue to the spars. The aluminum tanks require a bracket to be aligned with the tanks in position and the brackets clamped to the tank. Tricky.
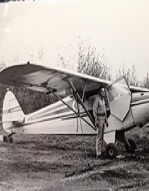
On the 22nd of July, our Highlander was stripped of its' wings and trailered to our home shop. Let the games begin! I opened up one wing and removed that tank that day. Those tanks were never intended to be removed, but this is supposed to be the short version. The hard part, before the bracket hard part, was to reshape the ribs from concave to flat bottomed. That's after removing the second rib. Remember, I have (had) the 9 gallon fiberglass tanks. The 13 gallon fiberglass was not available in 2005. I made a very thin spacer/adapter out of some marine plywood from Hobby Lobby. Actually I made 4 spacers. I also made 4 doublers to beef up those glue joints. Gluing plywood end to end and expecting it to not separate is not logical.
While I was at it I measured fairly closely the actual capacity of the tanks, old and new. Jak had mentioned that no one knew what the actual capacity was. My 9 gallon tanks held 9 gallons, give a take a pint. My new 13 gallon tanks hold 12.9 gallons, ditto.
I need to stress this part. It is vital to flush out your new tanks. While I was doing this I flushed out a ball of cuttings the size of a tennis ball. It wouldn't even come out of the tank by itself. I could kick myself for not taking a picture of it. Aside from this there were some, not a lot, of very small aluminum chips. These chips were just the right size to plug up the finger strainers.
The wing end ribs, in addition to being reshaped, now have to be modified for the relocated fuel supply fittings as well as the sight gauges. You must also replace, or reshape, the butt ribs. I replaced. It is impossible to explain how much finicky work this entails. I worked on this project 4 or 5 days a week for 5 or 6 hours a day for 10 weeks. I started on the 22nd of July and the first flight was the 2nd of October.
We hosted an EAA meeting at our shop during this process. I wanted to show everyone where the leak was. Of course, that meant I had to find it. Since the tanks were yellow/brownish already, the auto fuel stain didn't stand out. The slight stain on the inside bottom covering fabric helped zero into the area. I ended up putting a couple gallons of water in the tank and tipping it around slowly. It was coming from a flat, blank, unstained, smooth, area on the inboard side forward. Even when it was leaking it was impossible to see why.
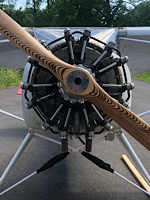
And then there's the cover. I covered the bottom with Stits. The top requires a metal cover that is screwed down with 44 screws, each of which requires it's own riveted on nut plate. I only used 42 screws, for the obvious reason. This was a lot of work but there was no other option. My friend Don, another builder, called my Highlander a "flying Molotov Cocktail". All said, I had a lot of fun doing this, but I'm glad it's over.
I know this is a long post but I could have made it much longer. Here are some pictures.
I have lots more if anybody wants to see them.
I called Jak and he told me he was doing the first factory installation of the 13 gallon tanks designed for the Super STOL in a new Highlander build. If I would come up he would walk me through how it's done. We arrived on July 14th and got a good look how it is done on a new wing. Mounting the brackets is tough to get exactly right. The fiberglass tanks just glue to the spars. The aluminum tanks require a bracket to be aligned with the tanks in position and the brackets clamped to the tank. Tricky.
On the 22nd of July, our Highlander was stripped of its' wings and trailered to our home shop. Let the games begin! I opened up one wing and removed that tank that day. Those tanks were never intended to be removed, but this is supposed to be the short version. The hard part, before the bracket hard part, was to reshape the ribs from concave to flat bottomed. That's after removing the second rib. Remember, I have (had) the 9 gallon fiberglass tanks. The 13 gallon fiberglass was not available in 2005. I made a very thin spacer/adapter out of some marine plywood from Hobby Lobby. Actually I made 4 spacers. I also made 4 doublers to beef up those glue joints. Gluing plywood end to end and expecting it to not separate is not logical.
While I was at it I measured fairly closely the actual capacity of the tanks, old and new. Jak had mentioned that no one knew what the actual capacity was. My 9 gallon tanks held 9 gallons, give a take a pint. My new 13 gallon tanks hold 12.9 gallons, ditto.
I need to stress this part. It is vital to flush out your new tanks. While I was doing this I flushed out a ball of cuttings the size of a tennis ball. It wouldn't even come out of the tank by itself. I could kick myself for not taking a picture of it. Aside from this there were some, not a lot, of very small aluminum chips. These chips were just the right size to plug up the finger strainers.
The wing end ribs, in addition to being reshaped, now have to be modified for the relocated fuel supply fittings as well as the sight gauges. You must also replace, or reshape, the butt ribs. I replaced. It is impossible to explain how much finicky work this entails. I worked on this project 4 or 5 days a week for 5 or 6 hours a day for 10 weeks. I started on the 22nd of July and the first flight was the 2nd of October.
We hosted an EAA meeting at our shop during this process. I wanted to show everyone where the leak was. Of course, that meant I had to find it. Since the tanks were yellow/brownish already, the auto fuel stain didn't stand out. The slight stain on the inside bottom covering fabric helped zero into the area. I ended up putting a couple gallons of water in the tank and tipping it around slowly. It was coming from a flat, blank, unstained, smooth, area on the inboard side forward. Even when it was leaking it was impossible to see why.
And then there's the cover. I covered the bottom with Stits. The top requires a metal cover that is screwed down with 44 screws, each of which requires it's own riveted on nut plate. I only used 42 screws, for the obvious reason. This was a lot of work but there was no other option. My friend Don, another builder, called my Highlander a "flying Molotov Cocktail". All said, I had a lot of fun doing this, but I'm glad it's over.
I know this is a long post but I could have made it much longer. Here are some pictures.
I have lots more if anybody wants to see them.
You do not have the required permissions to view the files attached to this post.
If I had known I would live this long I would have taken better care of myself.
-
alan
- Veteran Member
- Posts: 398
- Joined: Fri Feb 04, 2005 1:39 am
- Location: Baytown, TX
Re: Fuel tank upgrade
I knew I would forget something.
Since there is now a metal tank cover requiring VGs, I made my own metal VGs.
Since there is now a metal tank cover requiring VGs, I made my own metal VGs.
You do not have the required permissions to view the files attached to this post.
If I had known I would live this long I would have taken better care of myself.
-
Wes
- Premium Member
- Posts: 231
- Joined: Mon Jan 23, 2006 10:32 pm
- Location: Satellite Bch, Florida
Re: Fuel tank upgrade
Nice Job. Alan, - Congrats!
Thanks for sharing that experience , - and the great photos!
Since my Highlander is similar vintage (Kit # 95), I have nightmares about having to replace those tanks.
The larger tanks would have really helped on my long cross country trip this summer (I have the original 9 gal).
I now routinely use a 5 gal jug mounted in the baggage area that pumps into the header tank.
How are the aluminum tanks vented?
Way to go, now you have a real "bladder challenging" range with that airplane
Wes
Kit # 95
Low and Slow - The only way to go!
Low and Slow - The only way to go!
-
scubarider2

- Topic Moderator
- Posts: 1086
- Joined: Mon Jan 28, 2008 7:03 pm
- Location: Cleveland, GA
Re: Fuel tank upgrade
I have thought about replacing my tanks as well. I have the 13 gallon fiberglass ones. I have had some serious problems due to the inside of the tanks not cured properly. Brownish goo inside made its way into my Rotax and caused valve problems which has decreased my compression considerably. Had to have the valves replaced. Thought all was fixed but now see that it is starting over. I only use 97octane 100% fuel (no ethonol). Would love to put the new tanks in but wow that seems like a lot of hard work. 
Dennis
Dennis
Live as though you were going to die tomorrow, learn as though you were going to live forever...
-
alan
- Veteran Member
- Posts: 398
- Joined: Fri Feb 04, 2005 1:39 am
- Location: Baytown, TX
Re: Fuel tank upgrade
Thank you Wes.
So far, knock on wood, I have a 5 gallon bucket sized bladder. My wife has one the size of a cup of coffee.
The tanks have a vent chamber inside the cap that routes around to just under the rim of the cap. Jak made sure I knew to drill out the factory holes on the inside to 1/8". The holes are made by a machine that makes them large enough for a storage tank, but restricts outflow noticably.
Dennis, I avoided the bad epoxy problems but, after thoroughly flushing out my new (last annual) cleanable fuel filter, I found a fine powder the same color as the tanks. After 9 years and 650 hours using mostly 91 octane with ethanol auto gas, those old tanks had reached their "use by date".
It was quite a project but well worth the time.
If I had known I would live this long I would have taken better care of myself.
-
alan
- Veteran Member
- Posts: 398
- Joined: Fri Feb 04, 2005 1:39 am
- Location: Baytown, TX
Re: Fuel tank upgrade
"Just" bringing this to the top because the issue came up in a recent post.
Alan
Alan
If I had known I would live this long I would have taken better care of myself.
-
BDA
- Veteran Member
- Posts: 707
- Joined: Mon Aug 22, 2016 11:25 am
- Location: Kenai Alaska
Re: Fuel tank upgrade
Has anyone put aux tanks in the wings?
Another set of standard aluminum tanks?
Another set of standard aluminum tanks?
SuperStol XL Alaskan With Titan 340
N331AK. Shawn Taplin
Wing extensions,Symetrical Airfoil tail ribs (NACA 21)
Mods in progress: Heavier struts, Double slotted flaps
Goal: 15mph no wind
N331AK. Shawn Taplin
Wing extensions,Symetrical Airfoil tail ribs (NACA 21)
Mods in progress: Heavier struts, Double slotted flaps
Goal: 15mph no wind
-
z987k
- Forum Regular
- Posts: 25
- Joined: Mon Jul 03, 2017 9:38 pm
- Location: ANC
Re: Fuel tank upgrade
If I were to build another set of wings, I think I would. Just as you described. I've been battling just how little fuel these hold all summer. Right now I'm using two 7 gallon bushwheel bags that I got straight from china instead of through them since they only carry the 5. Having that much extra weight in the back isn't super ideal for getting the tail up asap.BDA wrote:Has anyone put aux tanks in the wings?
Another set of standard aluminum tanks?
Also now that I'm on the extended gear, I can only get 7 gallons in my 9 gallon tanks before it comes out the top... effective range is now really only 2:30ish. Not really useful for anything at all without carrying the extra gas. Even 4 hours of fuel in the wings is marginal.
Trying my best to transform these from a toy to a useful airplane, I think the two 13 gallon tanks per wing would do it. That and an airmaster prop and a bunch of fairings for cruise speed.
This is with a 912. With your 340... you might need a good bit more if you plan to do more than the peninsula and west inlet with it. 26 gallons with a 340 is like a min fuel at takeoff!
-
FredHoffman
- Veteran Member
- Posts: 136
- Joined: Fri Mar 23, 2012 8:57 pm
Re: Fuel tank upgrade
I have the 9 gallon tanks too. Still in the test flying mode, and it is becoming obvious I'll need more fuel to go cross country efficiently. I am going to build a 4 gallon header tank. Also thinking of having a removable 4 gallon aux tank on the opposite side that would have a pump to feed to the header tank. Started looking around and summit racing has quick disconnect fuel fittings, might be able to make a workable setup that can just snap in and out.
-
BDA
- Veteran Member
- Posts: 707
- Joined: Mon Aug 22, 2016 11:25 am
- Location: Kenai Alaska
Re: Fuel tank upgrade
Ya I am going to build an aux tank to go on pass seat rails for long stuff and flat tank for bagage comp.
just wondering if anyone has figured out more wing tanks yet, shouldnt be too hard.
just wondering if anyone has figured out more wing tanks yet, shouldnt be too hard.
SuperStol XL Alaskan With Titan 340
N331AK. Shawn Taplin
Wing extensions,Symetrical Airfoil tail ribs (NACA 21)
Mods in progress: Heavier struts, Double slotted flaps
Goal: 15mph no wind
N331AK. Shawn Taplin
Wing extensions,Symetrical Airfoil tail ribs (NACA 21)
Mods in progress: Heavier struts, Double slotted flaps
Goal: 15mph no wind
-
danerazz
- Veteran Member
- Posts: 1240
- Joined: Tue Aug 18, 2009 9:33 pm
- Location: Bangor
Re: Fuel tank upgrade
Just cap off the spars and fill them. Should be able to get about 11 gallons in all four spars (total).
Aaannnnd....comment!
Aaannnnd....comment!
Dane
Paralysis by analysis
#242
Paralysis by analysis
#242
-
BDA
- Veteran Member
- Posts: 707
- Joined: Mon Aug 22, 2016 11:25 am
- Location: Kenai Alaska
Re: Fuel tank upgrade
Kind of like the spray bars on a Pawnee?
Haha!
Haha!
SuperStol XL Alaskan With Titan 340
N331AK. Shawn Taplin
Wing extensions,Symetrical Airfoil tail ribs (NACA 21)
Mods in progress: Heavier struts, Double slotted flaps
Goal: 15mph no wind
N331AK. Shawn Taplin
Wing extensions,Symetrical Airfoil tail ribs (NACA 21)
Mods in progress: Heavier struts, Double slotted flaps
Goal: 15mph no wind